Configuration
Zimlet configuration
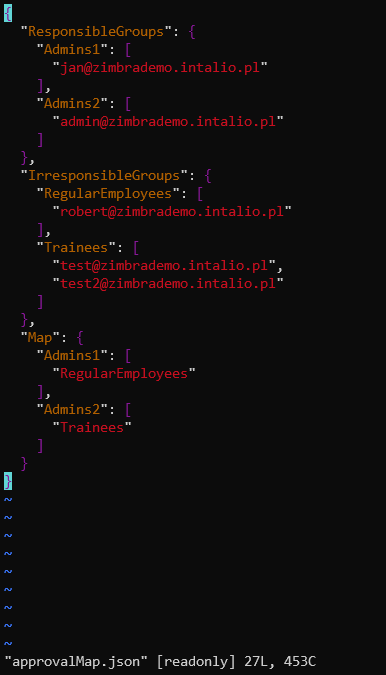
Main configuration is done through the config file available under /opt/zimbra/lib/ext/IntalioZiMailApproval/approvalMap.json
ResponsibleGroups - Groups of accounts accepting or declining e-mails.
IrresponsibleGroups - Groups of accounts whose e-mails have to be accepted or declined.
Map - Defines who can accept whose e-mails.
In the following example jan@zimbrademo.intalio.pl can review robert@zimbrademo.intalio.pl mails when he doen't have an influence on test@zimbrademo.intalio.pl account's mails.
Mail reviewers have to have also zimlet availibilty set on in the Zimbra Administration Console.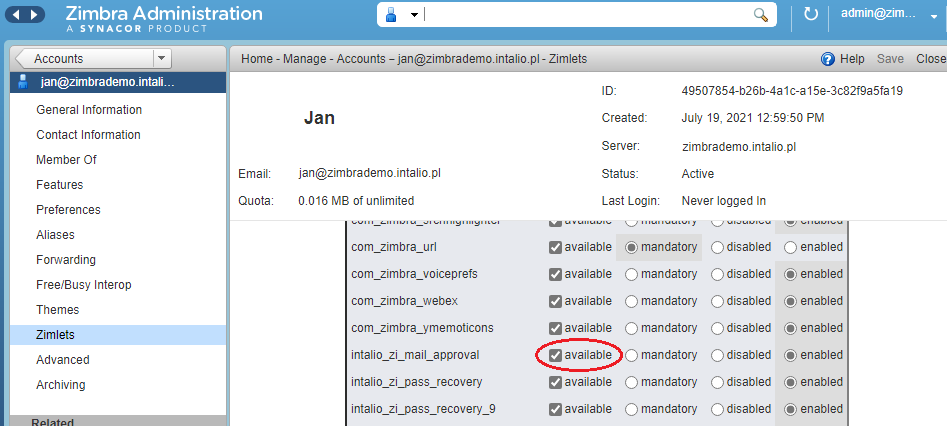
CBPolicyd configuration
ZI-MailApproval requires installed, enabled and configured CBPolicyd service.
Pre-requisites
Enable the Access Control attribute in Zimbra and restart services.
su - zimbra
zmprov ms `zmhostname` zimbraCBPolicydAccessControlEnabled  TRUE
zmmtactl restart
zmcbpolicydctl start
Group
- In PolicyD Web interface, Go to Policies -> Groups.
- Click on Action dropdown -> Add.
- Specify Name for example GrupaZiIntalioMailApproval. Click Submit. GrupaZiIntalioMailApproval group should be created successfully.

- Go to Policies -> Groups and select GrupaZiIntalioMailApproval and from Action dropdown select Members.

- On the page, from Action dropdown select Add
- In Member textbox, specify one of the users you want to assign to ZI-MailApproval functionality. Here test@zimbrademo.intalio.pl was used as an example. Then click Submit.

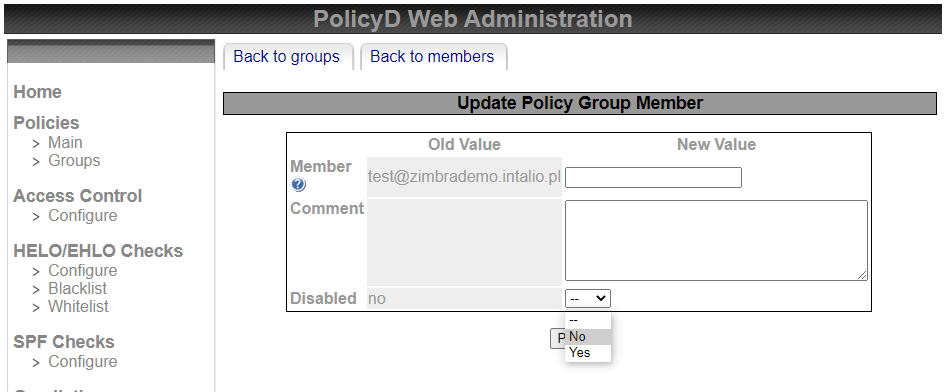
- At the top of the page, click on Back to members. Select the above created member test@zimbrademo.intalio.pl. From Action dropdown select Change.
- For Disabled, select No from the dropdown. Click Submit.

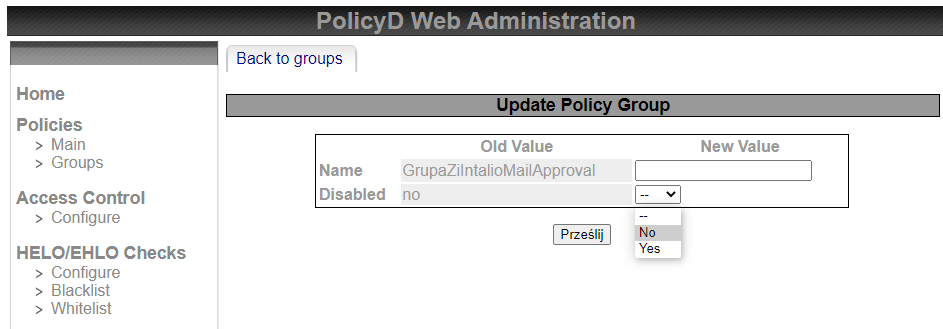
- Go to Policies -> Groups and select GrupaZiIntalioMailApproval. From Action dropdown select Change.
- For Disabled, select No from the dropdown. Click Submit

- The GrupaZiIntalioMailApproval group is now enabled.


Policy
- Go to Policies -> Main.
- Click on Action dropdown -> Add.
- Specify Name for example ZiIntalioMailApproval, Priority 10 and Description ZiIntalioMailApproval. Click Submit. The policy should be created successfully.

- Go to Policies -> Main and select ZiIntalioMailApproval. From Action dropdown select Members.
- On the page, from Action dropdown select Add.
- In Source textbox, specify %GrupaZiIntalioMailApproval and in Destination textbox, specify any. Click Submit.

- At the top of the page, click on Back to members. Select the above created member. From Action dropdown select Change.
- For Disabled, select No from the dropdown. Click Submit.
- Go to Policies -> Main and select ZiIntalioMailApproval. From Action dropdown select Change.
- For Disabled, select No from the dropdown. Click Submit.
- The ZiIntalioMailApproval policy is now enabled.


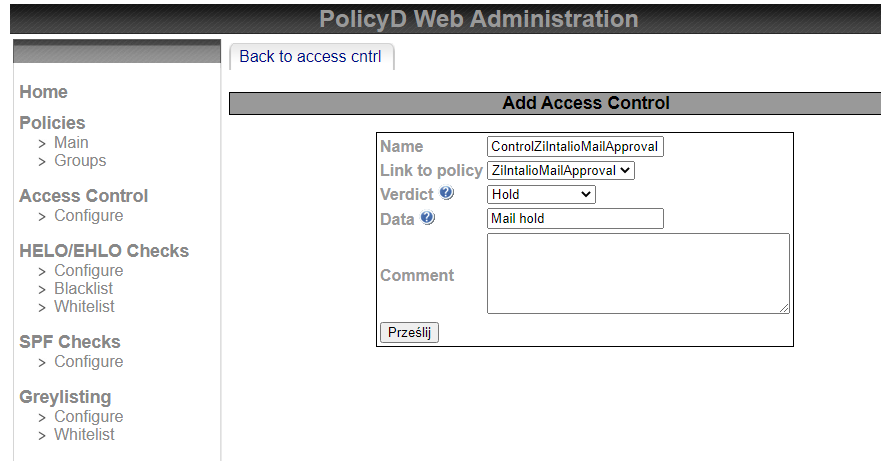
Access Control
- Go to Access Control -> Configure.
- Click on Action dropdown -> Add.
- In Name textbox, specify ControlZiIntalioMailApproval.
- In Link to policy dropdown, select policy ZiIntalioMailApproval
- In Verdict dropdown, select Hold.

- Click Submit. The Access Control list should be created successfully.
- Go to Access Control -> Configure and select ZiIntalioMailApproval
- From Action dropdown select Change.
- For Disabled, select No from the dropdown. Click Submit