ZI-ACCESS - Installation and Administration Guide
Installation or update
It is necessary to have ZI-LicenseSystem already installed in the system prior to any other ZI-* zimlet installation. Check here: ZI-LicenseSystem - Installation or update
To update zimlet to the newer version just follow the installation steps and when the installer asks you if you want to update answer: Y
Download the latest version of the zimlet package from https://www.intalio.pl/en/zi-access-downloads and unpack it in /tmp (as root) for exmaple:
cd /tmp
wget https://www.intalio.pl/sites/default/files/modules-files/zi-access-1.9-zimbra9.tar__0.gz
tar xvzf zi-access-1.9-zimbra9.tar_.gz
Be sure to download zimlet designed for your Zimbra release eg. 8.8.15 or 9.0.0
Run installation script (as root):
cd ./ZI-Access-1.9-Zimbra9/
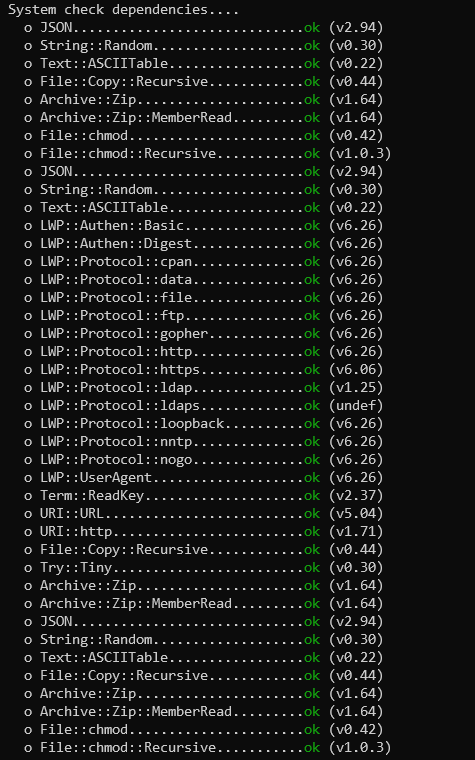
perl ./ZI-Installer --install-depsAt the beginning required perl packages will be installed if they are not available in the system already:
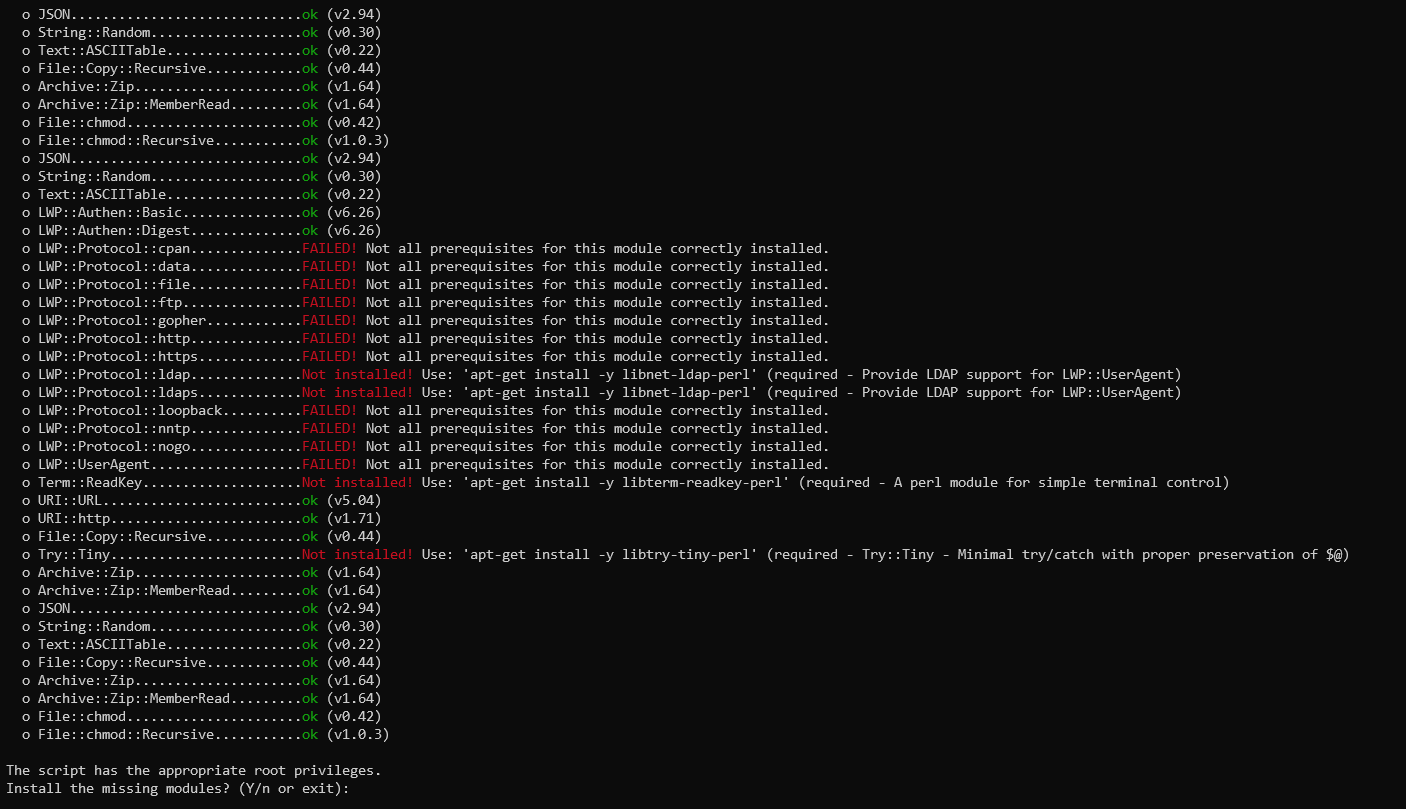
Answer: Y and wait until the package manager finishes its work:
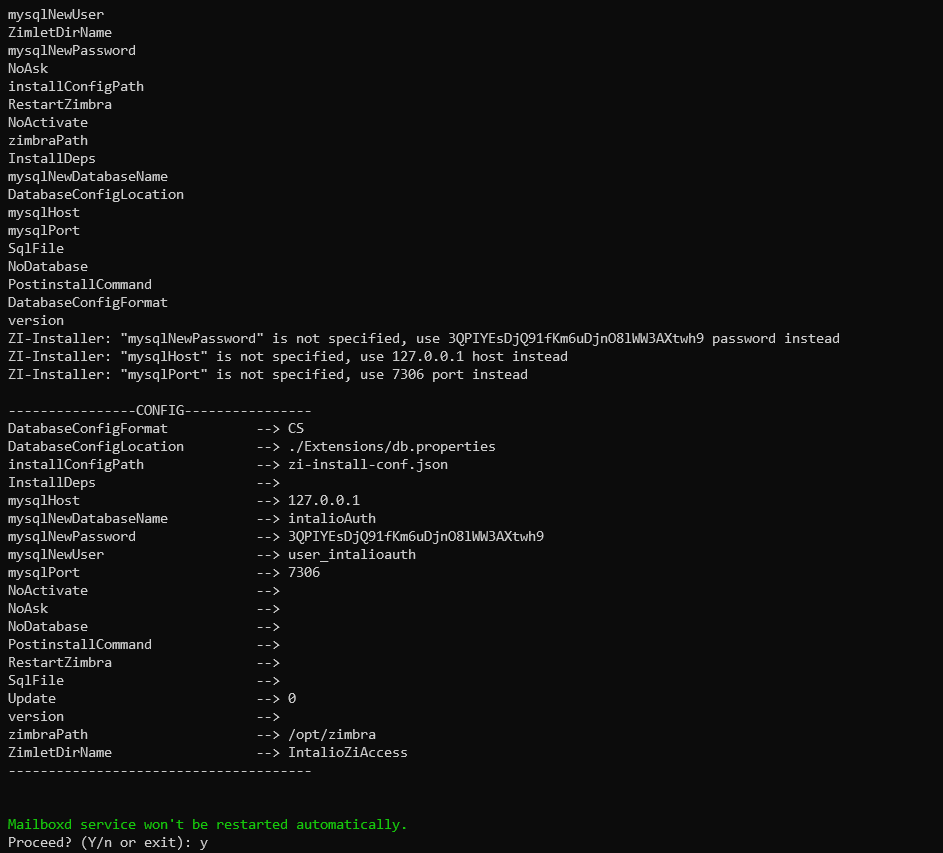
Type: Y and press Enter
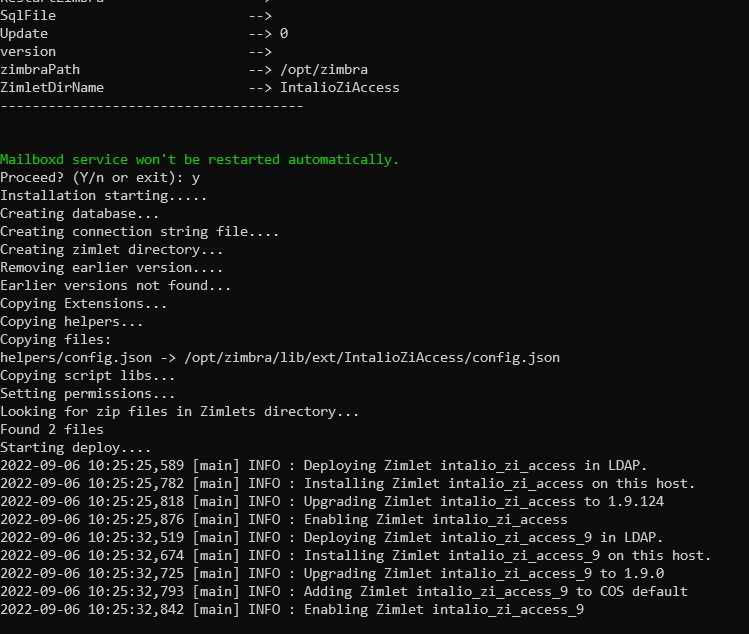
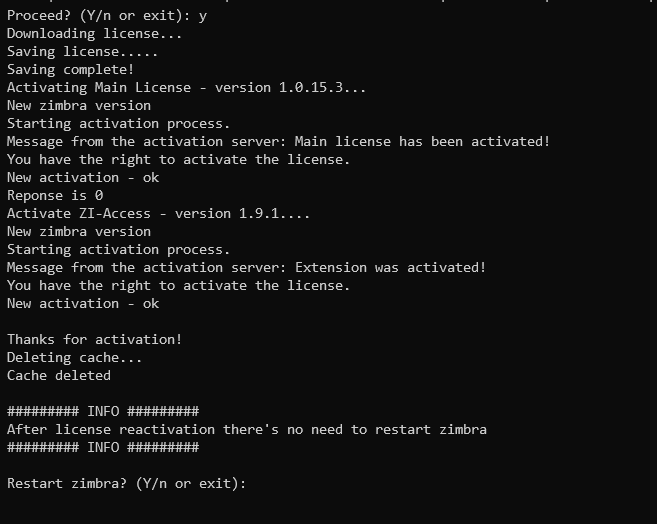
When the deployment process is done you will be asked to provide the login and password that you can find in the license documents you received from us:

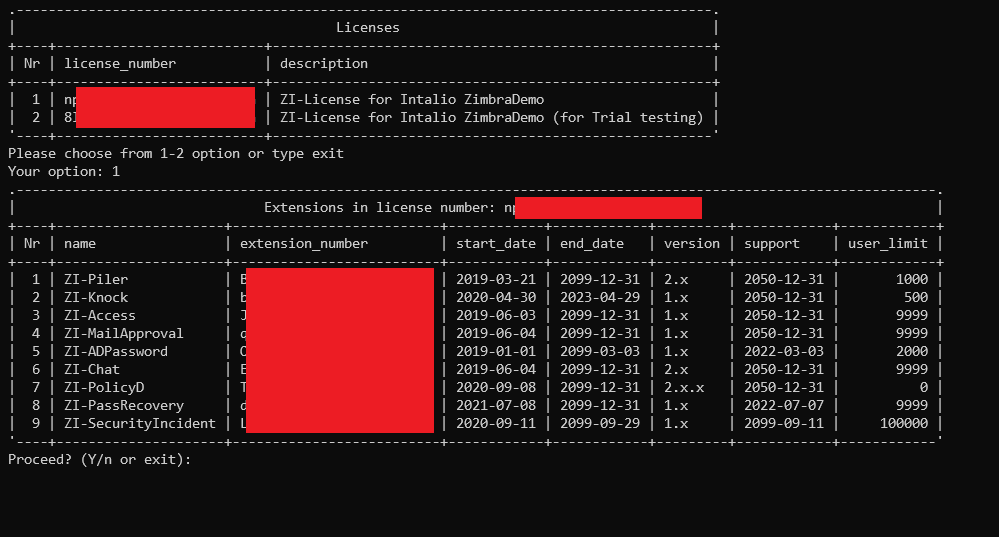
Choose the license number (usually you will see only one option), press Enter, verify that the details are correct and proceed by answering Y
Your license will be downloaded and activated. In the last step you will be asked to restart the mailbox service. You can skip it (answer: N) and restart the mailboxd service manually later but until that zimlet will not work properly.
If you are going to install another zimlet right after this one it's not necessary to restart the mailbox at this point and you can do it only once after installing the last one.
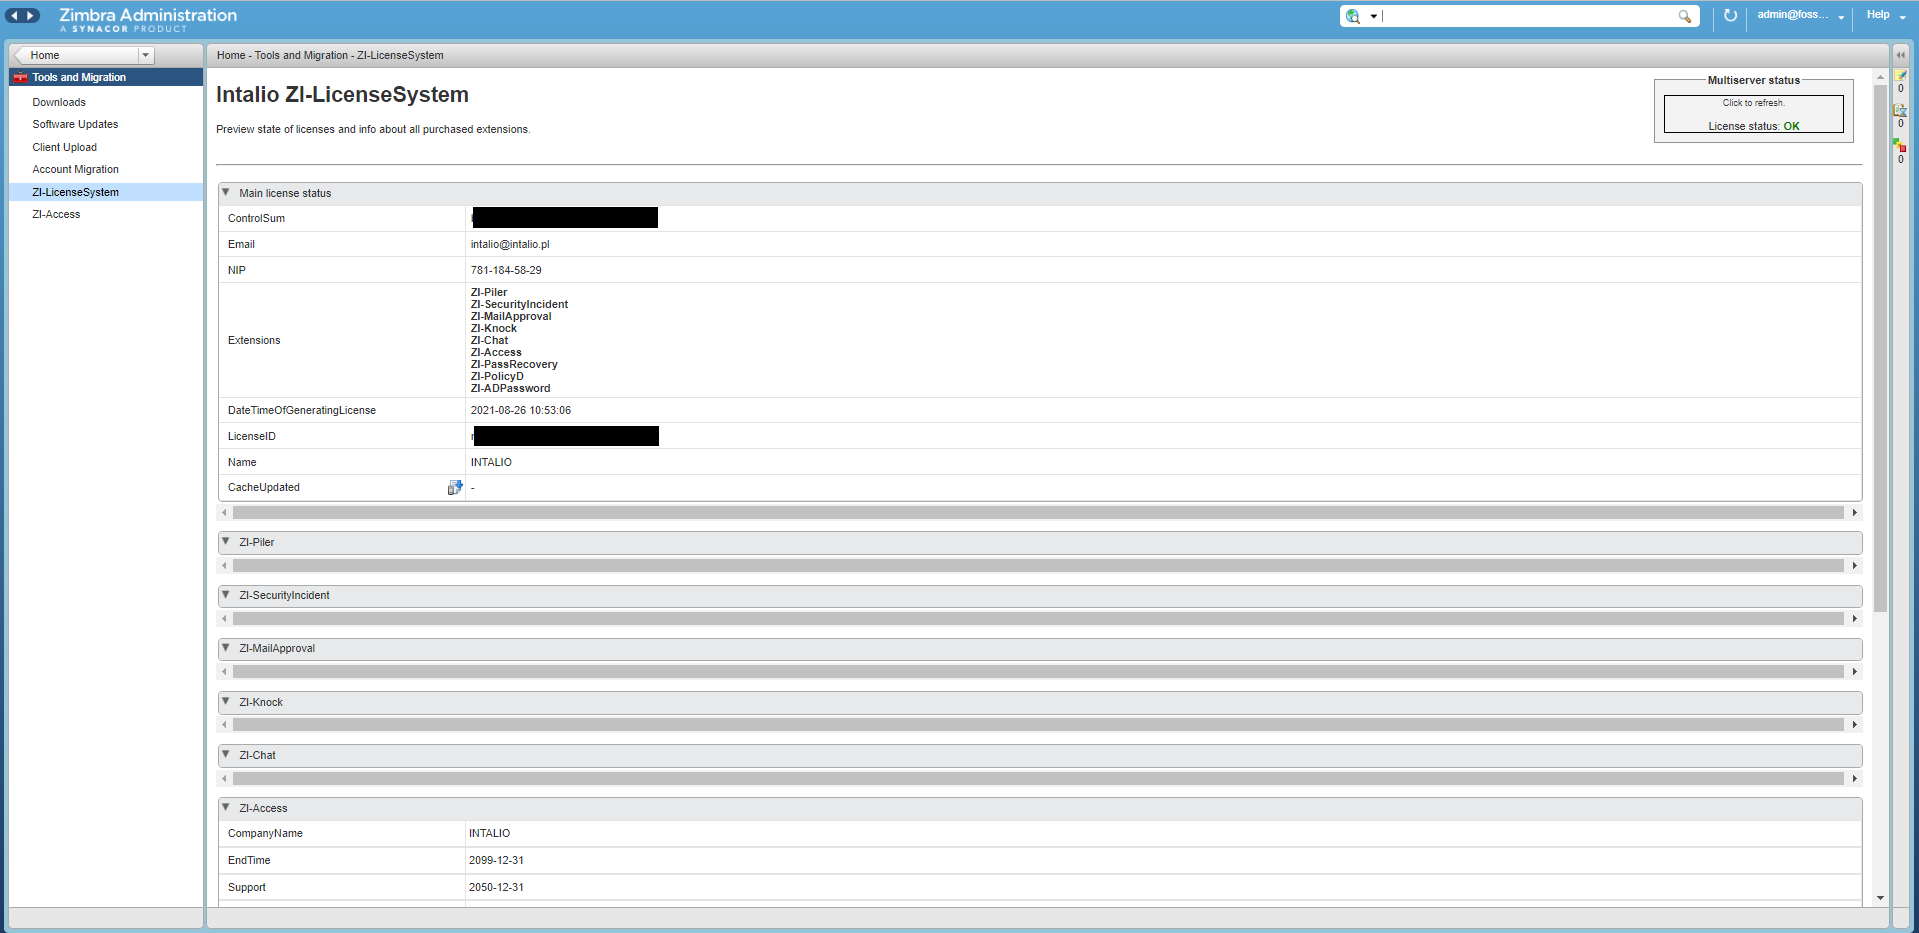
After the mailboxd restart, zimlet should be installed. To check it, log in to the Administration Console of your ZCS Server and navigate to Tools and Migration > ZI-LicenseSystem where you can find details about granted licenses or Tools and Migration > ZI-Access where you can configure your zimlet.
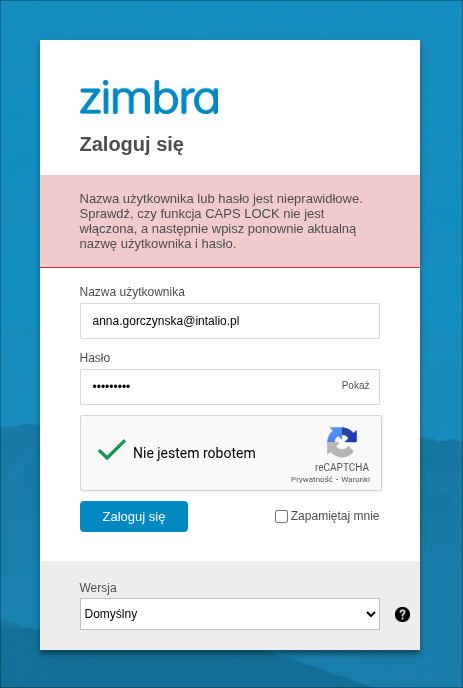
reCAPTCHA (only in v2.x)
To be able to use the reCaptcha feature you have to manually copy the whole content of the helpers/reCaptcha_patch.html file to the /opt/zimbra/jetty/webapps/zimbra/public/login.jsp file right before the
</body>
</html>After any Zimbra patch installation or Zimbra upgrade it is possible that the /opt/zimbra/jetty/webapps/zimbra/public/login.jsp may be overwritten so you have to check that proper reCaptcha script is in there after you finish updating your Zimbra.
Zimlet configuration
Overview
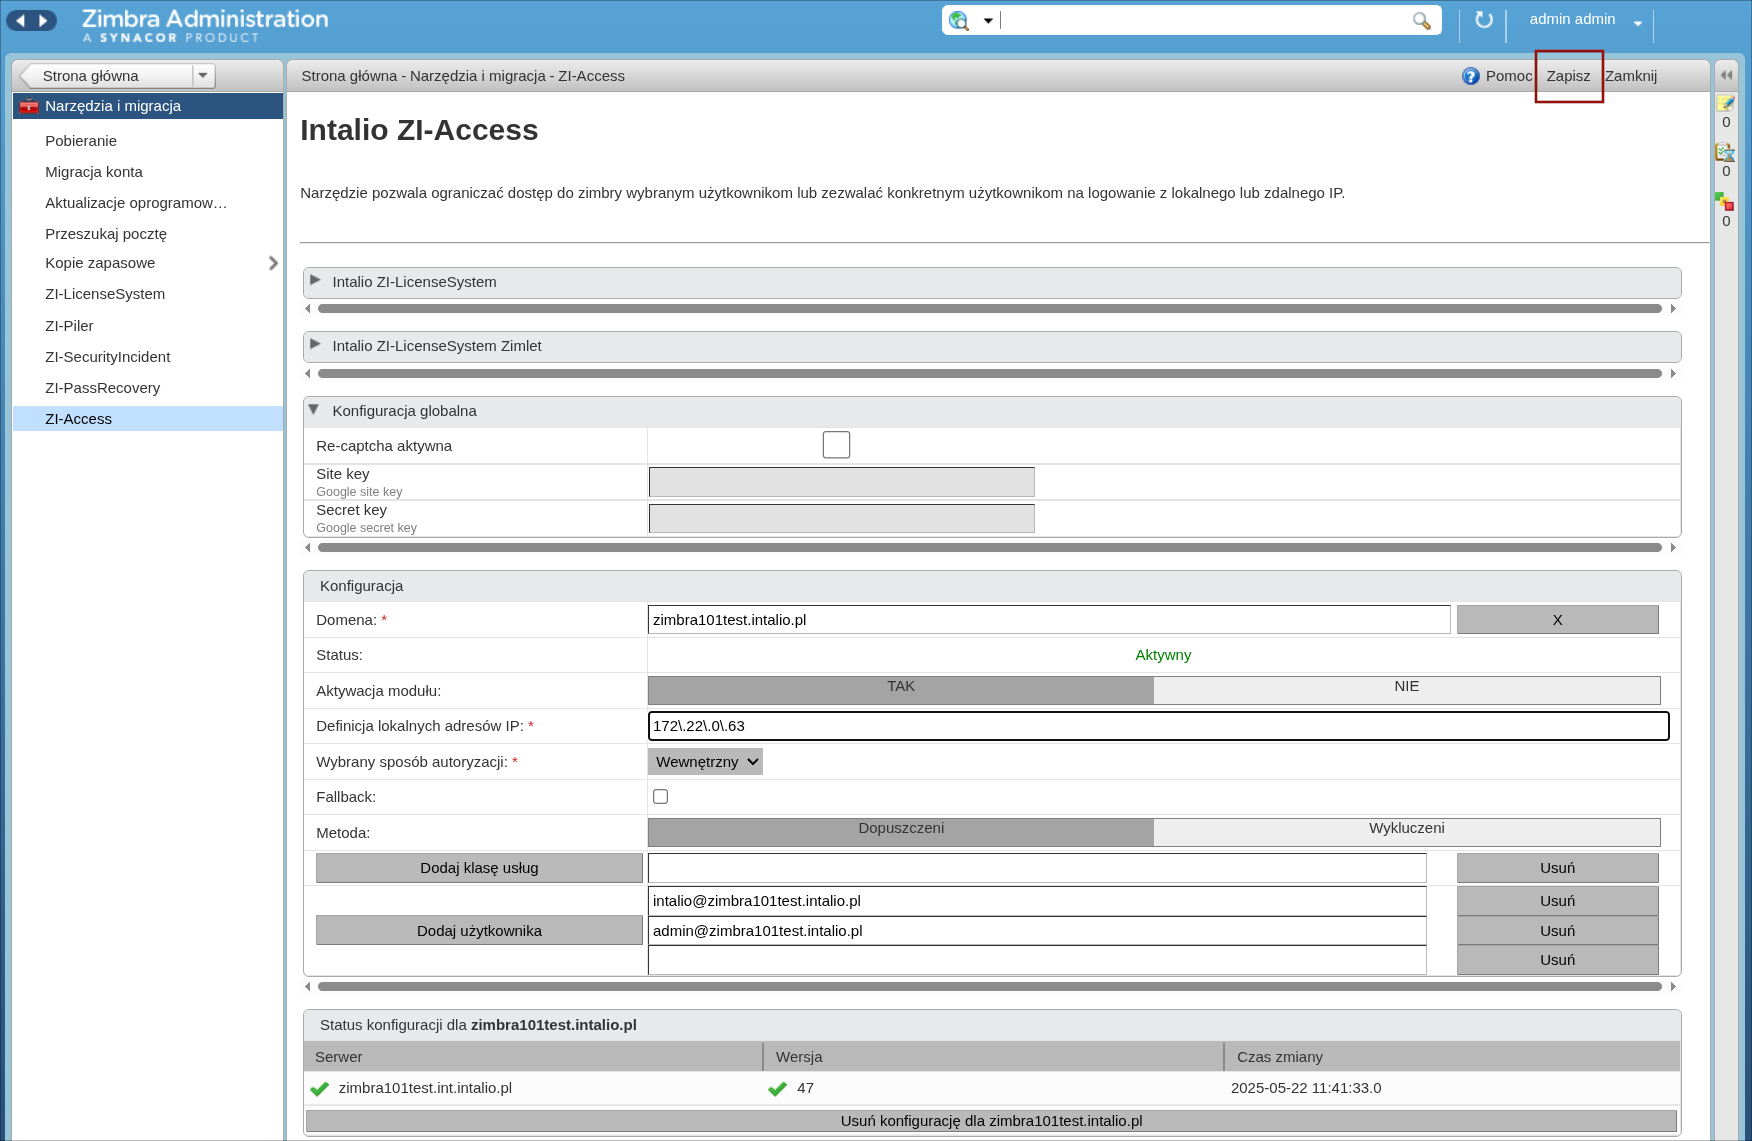
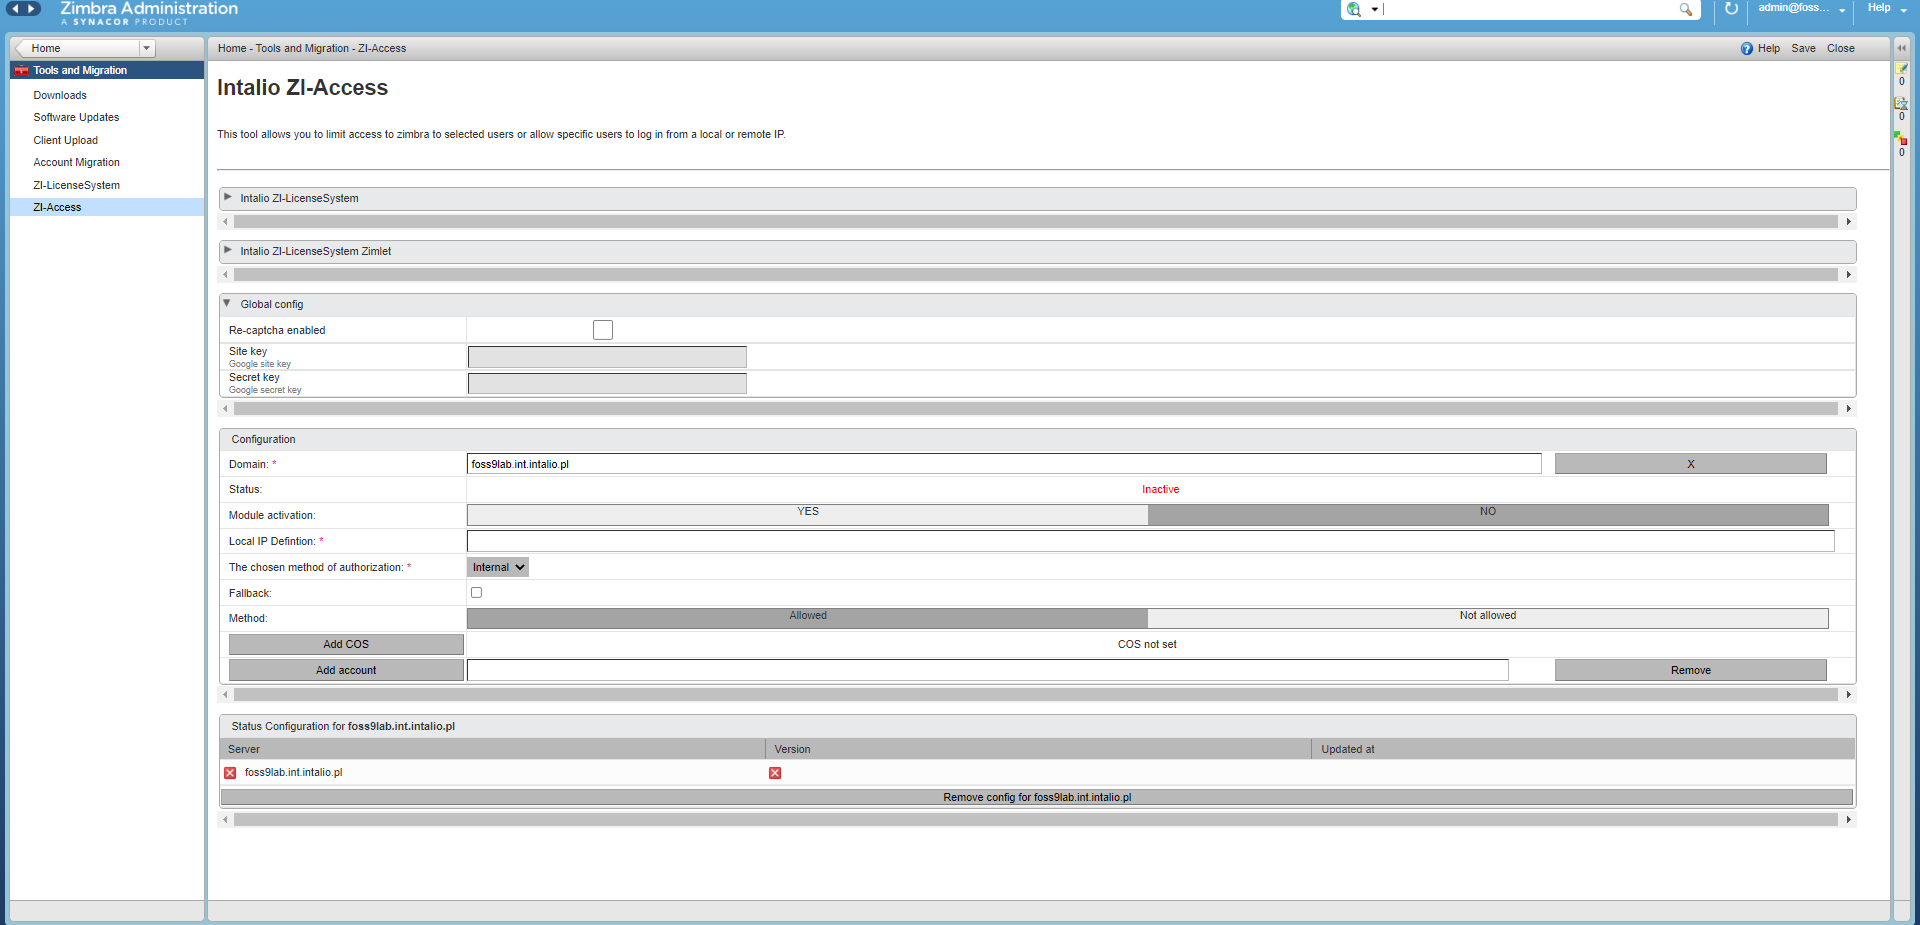
To configure the ZI-Access zimlet, please open the Administration Console > Tools and migration > ZI-Access
ZI-Access consists of the following display panes:
- Intalio ZI-LicenseSystem - displays license informations
- Intalio ZI-LicenseSystem Zimlet - displays information about licensed zimlets
- Global config - a configuration that is applied for all of the domains for which the ZI-Access module is activated (Module activation: YES)
- Configuration - main panel of the zimlet where you set per domain configuration
- Status - here you will see configuration version number (and when it was saved) for the selected domain on each mailbox server (it has to be the same version on all of them for the zimlet to work properly)
Configuration
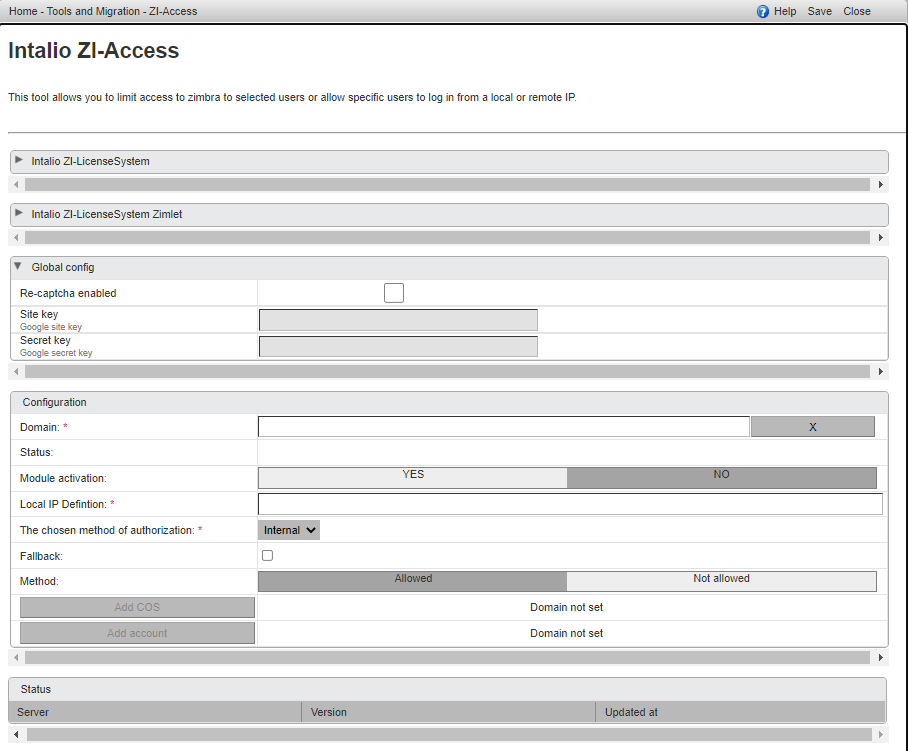
The fields on the Configuration Panel have the following meaning:
- Domain - type in a domain name that you want ZI-Access to be configured for
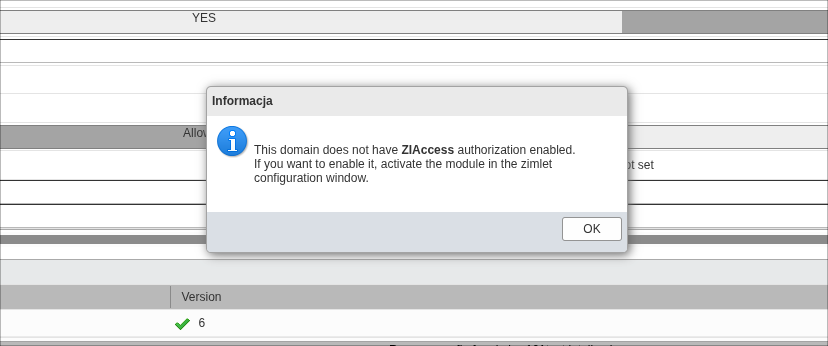
- Status - indicates wherever ZI-Access is enabled for the domain
- Modul activation - choose YES or NO to enable or disable ZI-Access for the selected domain
-
Local IP Definition - it's a list of IPs in regex form that determine which IPs are considered "local"
For example list: (10.193.\d{1,3}.\d{1,3})|(10.194.\d{1,3}.\d{1,3})
means that 10.193.*.* or 10.194.*.* IP addresses will be treated as "local" IPs
Depending on the choosen Method "local" IP addresses from this list will be allowed or not allowed to accessIf you only want to use the reCAPTCHA functionality then fill this box with .*
- The chosen method of authorization - choose method of authorization configured in the domain (Internal, AD or LDAP)
- Fallback - enable this option if you have AD or LDAP external authorization and you want to use Fallback to Local
- Method - If you select Allowed then COSes or accounts that meet the regular expression declared above will be able to log in. If you select Not allowed then those specific COSes or accounts meeting the regular expression will not be able to log in.
- Add COS - type in a COS name you want to grant access (if Method set to Allowed) or block access (if Method set to Not Allowed)
- Add account - account name you want to grant access (if Method set to Allowed) or block access (if Method set to Not Allowed)
After filling out the form switch Module activation to YES and then click Save (in the top right corner).
If you use External Authentication (LDAP or Active Directory) you have to turn off Fallback to Local on your domainszmprov md contoso.com zimbraAuthFallbackToLocal FALSE
and use the Fallback checkbox in the ZI-Access settings if you want to.
reCAPTCHA
Soon
Necessary Zimbra configuration
Originating IP
In a multi-server environment, or any environment running a proxy, a mailbox server may only log the IP of the connecting proxy instead of the real client IP.
For example:
2022-09-06 15:21:29,972 INFO [qtp192881625-932://localhost:8080/service/soap/BatchRequest] [name=admin@foss9lab.int.intalio.pl;oip=172.17.0.147;ua=zclient/9.0.0_GA_4373;soapId=7e375894;] account - Authentication successful for user: admin@foss9lab.int.intalio.plIn such case ZI-Access will not work.
To solve this you have to define the Trusted IPs of your internal nginx proxies, so that the mailstores will instead capture the data on the originating IP from the HTTP traffic. By default, the zimbraMailTrustedIP is empty:
zmprov gcf zimbraMailTrustedIPBy adding your nginx proxy addresses (as seen by the mailstores) to this attribute, it should then log appropriately. For example, if there are two nginx proxies 10.11.12.1 and 10.11.12.2:
zmprov mcf +zimbraMailTrustedIP 10.11.12.1 +zimbraMailTrustedIP 10.11.12.2Please note here too, if you are running Nginx on the same node as the mailstore, you will need to add both 127.0.0.1 and the real address of that node:
zmprov mcf +zimbraMailTrustedIP 127.0.0.1 +zimbraMailTrustedIP 10.11.12.13Then restart mailboxd
zmmailboxdctl restartAnd check /opt/zimbra/log/mailbox.log to find out that now "oip=" presents the real client IP address
2022-09-06 15:56:50,653 INFO [qtp192881625-128://localhost:8080/service/soap/BatchRequest] [name=admin@foss9lab.int.intalio.pl;oip=172.17.0.140;ua=zclient/9.0.0_GA_4373;soapId=6fbb7960;] account - Authentication successful for user: admin@foss9lab.int.intalio.plRelease Notes
ZI-Access 2.5
-
Zmieniono sposobu zapisu wprowadzonych zmian. Od teraz trzeba każdorazowo kliknąć "Zapisz" w prawym górnym rogu. Nie wystarczy jak wcześniej kliknąć "TAK" przy aktywacji zimletu.

-
Zmieniono kolejność mechanizmów autentykacji w przypadku aktywnego modułu. Od teraz proces autentykacji rozpoczyna się od weryfikacji, czy adres IP inicjujący logowanie znajduje się na liście dozwolonych jako lokalne. W przypadku adresu niedozwolonego dalsza weryfikacja nie jest wykonywana, co zapobiega zablokowaniu konta w wyniku wielokrotnych prób logowania z nieprawidłowym hasłem. Autentykacja zostaje przerwane, a użytkownikowi prezentowany jest komunikat o braku dostępu.

-
Dodatkowo poprawiono mechanizm blokowania konta w przypadku jednoczesnego aktywowania funkcji reCaptcha - blokada lub zwiększenie licznika nieudanych logowań następuje wyłącznie po podaniu błędnego hasła wraz z kluczem zdefiniowanym w
whitelist_recaptcha_keys. Zapobiega to blokowaniu kont przez atakujących, którzy nie posiadają poprawnego klucza. -
Zaktualizowano angielskie tłumaczenia komunikatów wyświetlanych w okienkach dialogowych

-
Poprawiono literówkę w komunikacie o błędzie autentykacji.

- Usunięto problem powodujący błąd „URI too long” po zaakceptowaniu reCaptcha i kliknięciu „Zaloguj” przy jednoczesnym podaniu nieprawidłowego hasła??