Administration
- System configuration
- System administrator
- Checking configuration
- Adding cities
- Adding buildings
- Adding rooms
System configuration
In the system configuration you will find plenty of fields that will allow you to customise your conference rooms system.
To see all configuration options:
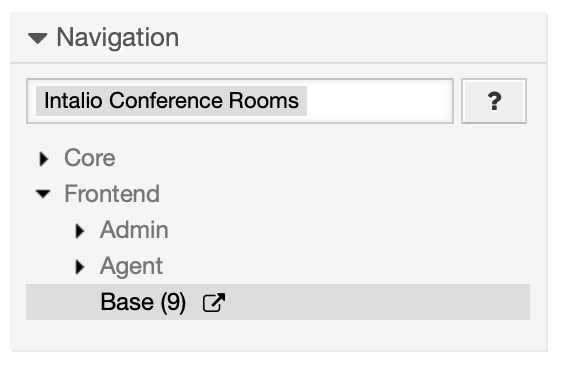
- Click on the Admin tab and pick System configuration
- Find Intalio Conference Rooms in the Navigation bar
- From the dropdown menu choose Frontend -> Base

ResourcesManagement::AdditionalResources
List of additional resources that are available to pick by the users when they schedule a reservation i.e.
- catering
- Internet connection
- videoconference
- projector
- board
ResourcesManagement::RoomReservationAdminGroup
Defines group name for the Conference Rooms admin users.
Add an agent to this group to gain the Admin permissions.
Example value: closed successsful
ResourcesManagement::RoomReservationActiveState
Defines the default state of accepted reservation
Example value: closed successsful
ResourcesManagement::RoomReservationNotActiveYetState
Defines the default state of pending reservation
Example value: new
ResourcesManagement::RoomReservationRejectedState
Defines the default state of rejected reservation
Example value: rejected
ResourcesManagement::RoomReservationMinTimeBetweenReservations
Defines the minumum time (in minutes) between reservations.
The user will not be able to create another reservation in less than e.g. 15 minutes before and after the given reservation. This limitation allows you to prepare the room for the next meeting.
Example value: 15
ResourcesManagement::RoomReservationDefaultQueue
Defines the default queue for new room reservation ticket.
Example value: Reservations
ResourcesManagement::RoomReservationRoomTypes
List of possible room types.
Users will be able to filter rooms based on this parameter.
- Conference
- Computer
- Other
System administrator
Some of the configuration features of the Conference Rooms system are accessible only for the administrators group.
Read more about configuring Conference Room including administrators group name
Checking if you are an admin
There is a label in the title bar on the dashboard and check config pages that describe your current role. If you see the You are admin label it means that you have the admin rights.

Checking configuration
We created a simple page that allow administrators check out the current Conference Rooms system configuration.
Go to Conference Rooms' check config page - /checkConfig?sessionId=tpXQ89oXql0BfuPKvfss09wZwC232yHA (remember to update the sessionId parameter).
Only administrators are allowed to see the page content. Read more about system configuration including setting the administrator group.
Adding cities
You can manage cities in a few simple steps.
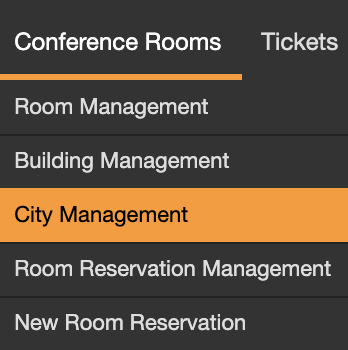
Go to the cities list by opening the Conference Rooms tab in the main menu and clicking City Management.
Click Add city button in the actions block to add a new city. 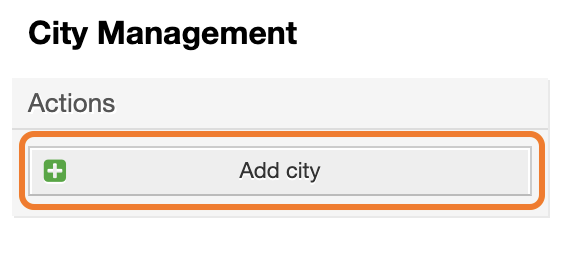
Fill out the city name and make sure that the Validity is set to Yes.
Submit the form.
You should see a new city on your cities list. You can add more cities if necessary.
Adding buildings
You can manage buildings in a few simple steps.
Buildings must be placed in the cities so make sure you have added at least one city before proceeding further.
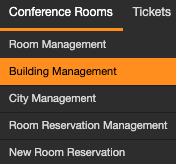
Go to the buildings list by opening the Conference Rooms tab in the main menu and clicking Building Management.
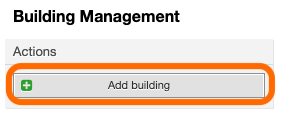
Click Add building button in the actions block to add a new building.
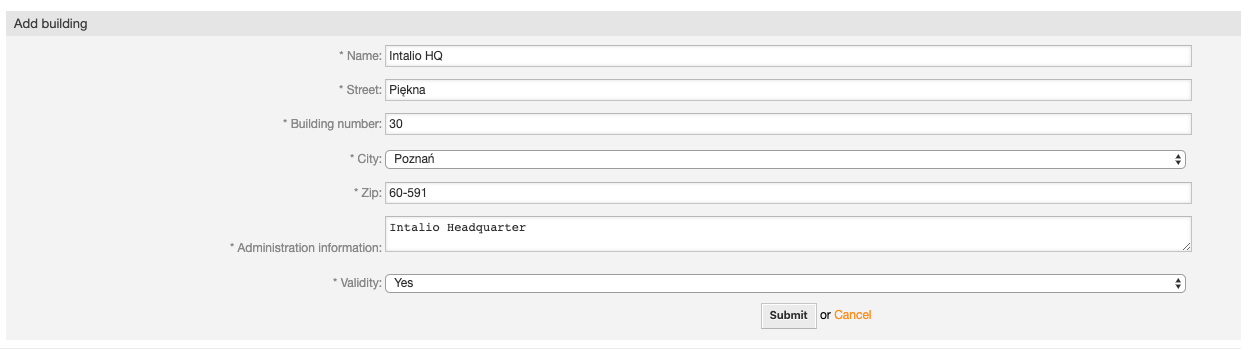
Fill out the information about your building and make sure that the Validity is set to Yes.
Submit the form.
You should see a new building on your buildings list. You can add more buildings if necessary.
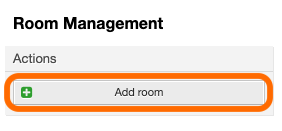
Adding rooms
You can manage rooms in a few simple steps.
Rooms must be placed in the buildings so make sure you have added at least one building before proceeding further.
Go to the rooms list by opening the Conference Rooms tab in the main menu and clicking Rooms Management.
Click Add room button in the actions block to add a new room.
Fill out the information about your room.
Type
Users will be able to filter rooms based on this parameter.
If you wish to add more room types look for the System Configuration in the manual.
Room managers e-mail addresses
Users whose e-mail addresses will correspond to the addresses indicated in this field will receive the rights to administer the rooms. They will be able to accept, reject and edit other users' reservations.
Example value: room.manager1@intalio.pl,room.manager2@intalio.pl
Additional resources
Select resources that are available in this room. You can add more than one by holding Ctrl key (or ⌘ key on a Mac).
If you wish to add more resources look for the System Configuration in the manual.
Private
Reservations for private rooms can only be made by local administrators. Regular users will still see private room on the rooms list, but they will not be able to book it by themselves. Contact with room manager will be required.
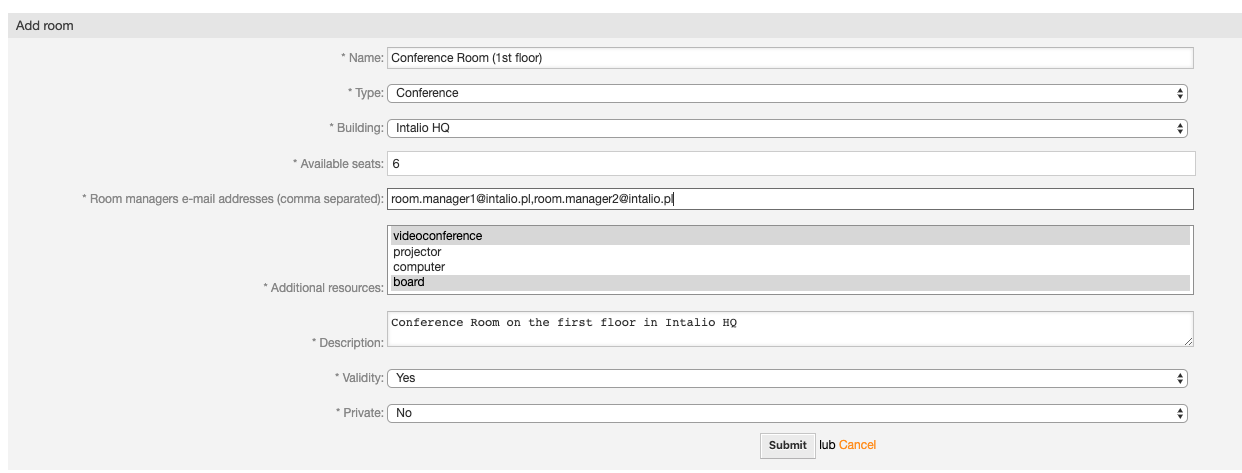
Make sure that you set the Validity to Yes and submit the form.
You should see a new room on your rooms list. You can add more rooms if necessary.